Showing posts with label Print-on-Demand. Show all posts

Secrets of Saving as PDF, How and Why

Free Ebook

You’ve seen links like the one above. You’ve probably clicked them and know they produce PDF files. Did you know you can save your own files in that form? Did you know when and why know you should? Here are three compelling reasons:

  1. If you share a Word document with someone else, they may not have the same version as you, and they may not have the fonts you use. Your document may not display right for them. By saving as a PDF, you can embed the fonts, and the file will look the same on a Mac, a PC, or an Android based device.
  2. If you share a Word document, others can copy from or edit it. PDF files are more secure. Few people know how to copy text from a PDF file. Fewer still have a clue how to edit them or the special software to do so.
  3. If you upload to an online printer, like CreateSpace or any POD publisher, they require PDF files, and they must have embedded fonts and be formatted with the right paper size for your project.
  4. For long-term storage, PDF is the archivist’s best bet. PDF files from twenty years ago still display just fine. That’s definitely not the case with word processing documents.

The good news is that this conversion is easy to do and if you don’t already have software to do it, it’s widely available for free.

So, you say, “I’m sold. How do I do this?”

The tutorial below will walk you through three different paths, starting with the simplest one first.

Save as a PDF with Word (or OpenOffice or most any word processing program)

  1. Whatever program you’re using, select Save As. They’ll all be pretty much the same as what you see here.
  2. Click the tiny arrow on the right of the Save as type field. Select PDF from the flyout menu.

    PDF 0 - Word file type
  3. Check the options. First check that your file is optimized for printing if you are uploading to CreateSpace or have other plans to print. If it’s primarily for onscreen viewing, select the Minimum size option.  Then click the Options menu to the right and make sure the box, Bitmap Text when fonts may not be embedded is checked.

    PDF 1 - Word save as options
    Word automatically adjusts page size (in case you are saving a file with pages some size other than 8.5” x 11”) and embeds fonts. Some commercial fonts can’t be embedded, at least not without a special license. This option ensures they’ll be readable on the other end.

LibreOffice, based on OpenOffice, has an Export as PDF function rather than Save As. For POD publishing, select 100% for JPEG compressions. Other tabs include lots of bells and whistles, but nothing important for our purposes here.

Print as a PDF

Aside from word processing programs and maybe a couple of others, you create PDF files by “printing” them to a digital page. To do this you use a printer driver much like the one for printers that use ink. This means that if you find an error and need to fix it, you go back to your source file, i.e. your Word document, make your change, then “print” the file again, just as you’d do with paper.

Many PDF printer apps are available for free download on the Internet. The ones I’ve looked at all use print setup interfaces similar to one of the two types I’ll show below. I’ll begin with Cute PDF, but first a caveat about downloading any free software:

It often comes bundled with add-on apps. You do not need these add-on apps. They probably aren’t malware, but why take the chance? Only download specific programs that you know you need, want and trust. The add-ons keep the software free, but you can avoid them by paying close attention. Reputable software publishers today offer you the opportunity to opt out of add-ons. If you see any window that asks you to click to install anything other than the app you selected, look for an opportunity to Decline, or a button that says Next. If you don’t see any option like this. kill the installation and find another app. If you accidentally download something you don’t want, on a Windows machine, use System Restore and go back to the a time before the download.

Now a second caveat: I’ve used both the apps in the examples below and they are both satisfactory. They are not necessarily the best or the latest. The field keeps changing. Do a search for PDF conversion software, then check reviews before selecting one. You may want to try two or three.  And don’t be fooled that you need to buy anything unless you want to edit PDFs. If you don’t know, you don’t need it. The conversion engine will be free.

Using the Cute PDF Interface

This interface has been around for years and is shared by many of the free apps.

  1. Find your way to the Print menu for your file. Click the arrow on the right and select Cute PDF (or another of your choice) as your printer.

    PDF A1 - Select Printer
  2. Click Printer Properties to open the printer setup dialog.

    PDF A - Open Setup Dialog, Cute
  3. Click Advanced on the Document Properties menu.

    PDF B - Options Cute
    From here you can change the page orientation, and select color or grayscale from the Paper/Quality tab. Advanced gives you more options, including embedding fonts.
  4. By default most PDF printers substitute device fonts to keep file size small. Play it safe over the long run. Embed your fonts by selecting Download as Softfont in the TrueType font line.

    PDF D - Font embedding - Cute
  5. Change paper size. This won’t matter if you’re sticking with standard letter-sized paper. For books and other special projects, you need the Paper Size option.

    PDF C - Advanced Options - Cute
  6. Monitor Print Quality. This app saves images at 600 dpi by default. CreateSpace asks for 300 dpi, which also works well on home printers. Nothing but file size is gained by saving them at higher resolution.

    PDF E - Print Quality - Cute
  7. In the fly out that opens when you click the Paper Size field, check to see if your page size is listed. If not, scroll down to PostScript Custom Page Size. A new menu will open.

    PDF F - Custom Page Size - Cute
  8. Enter your page dimensions. These should be identical to the paper size you designated in Word.  You will probably use inches, but millimeters and points are also options. Don’t concern yourself with the rest.

    PDF G - Set Page Size - Cute

That’s it. Click OK as many times as you need, then click Print. You’ll be asked to specify a file name and location the same as saving any other file. Remember, this is a digital page, so it’s stored as a digital file, just like your Word document.

Using the Foxit Phantom PDF Printer

This app uses a newer interface with fewer options. Don’t concern yourself with what you don’t see.

  1. Select Foxit Phantom PDF Printer and click on Printer Properties as above.
  2. On the General tab, select Quality and Color. For publishing, you want High Quality Print. For other purposes, standard works fine. Don’t concern yourself with the confusing options behind that Edit button.
    PDF 5 - Print Qualtiy
  3. Alter page size if needed on the Layout tab. Click the Custom Page Size button.
    PDF 3 - Custom Page Size 1
  4. Enter your page size. As above, this needs to be identical to your document paper size.
    PDF 4 - Add Custom Page Size
  5. That’s it. Click Okay and print as above. You can add document properties information as you wish. If you’re saving for widespread public distribution, this is a way to ensure you retain credit for your work.

You may find slight variations in software interfaces, but these three examples should be enough to guide you through any of them. Now, go forth and fill hard drives and cyberspace with your work!

Lessons Learned on the Amazon Path

Amazon-eveningNo, I have not been on vacation to the Amazon recently, though I wish I had – except not right now during its rainy season. I’m referring here to the unexpected twists and turns on the path to the Kindle Direct Publishing (KDP) arm of Amazon.com  as I completed my journey toward publication of Adventures of a Chilehead.

I wrote about early details of this project in three posts in June: “Chile or Chile? Check it Out,” “Lessons Learned”, and “Story Album to Memoir.” In July that early manuscript flowed through email to a team of beta readers. After incorporating their sage advice about need for further detail, spots that needed an edit and more, I thought final layout was all I needed to do before the book was ready for publication.

That predictably became complicated, and pressures of preparing for classes I was teaching in September resulted in setting the project aside for more than two months. When I reopened the project in late October, I was stunned. I read a paper copy of the manuscript and realized it still needed a lot of work. Here are a few of the lessons I learned (or relearned) in the process:

Wine, cheese and stories improve with proper aging. This is not news to me. I often open story files I haven’t looked at for months and years and see dramatic improvements I could make. We get too close to our work to be objective. Setting it aside and immersing our thoughts in something else for a time allows us to return with fresh vision and perspective.

In the future, I’ll schedule in these breaks before final publication. I always underestimate the time required anyway.

Expect unexpected glitches. This time the unexpected glitch was a section break meltdown in my print version of the manuscript.  Since this was a print document, having the precise type of section break (odd page, next page) was not as important as having some section break to control page header changes. I did an end run and arm-wrestled that gator to the ground. Then, after all was said and done, I checked online and found the solution.

In the future, I’ll turn to Google right away. 

Proof-read in many modes. Again, this was not news. But sure enough, a paper printout looked different from anything digital. When I read the.mobi file proof from the KDP site, I found several more rough spots that needed further sanding. When I ordered my print proof copy, I filled it with flags. Not until I saw that final print version did I realize I’d failed to check for stragglers (those stray single words at the ends of paragraphs) after reducing the margins by .2”. As long as I was making those changes, I found even more opportunities for improvement.

In the future I’ll print a paper copy of the final pdf version before uploading.

Remember that stories of any size are always a work in progress – like life itself. At some point it’s time to realize it’s as good as it’s going to get. Click the Publish button and get on with it. You can go back and make changes later if you want, but at some point it’s time to turn loose and move on.

So, it’s done. My path finally led to the river. You can purchase your copy of the Kindle version of Adventures of a Chilehead: A Mini-Memoir with Recipes on Amazon right now. The print version should be ready for orders by December 6. I had so much fun writing this book, I hate to see it finished, but it is time to set it free and hopefully watch it soar. I’ll tell you more about some of the elements that made it such fun very soon.

Write Now: If you are working on a story that’s driving you nuts, set it aside. Let it age for two or three months. Pull out an unfinished story or project that’s been sitting around for a few weeks or longer and work on that.  Your old story will sound fresh to you and you’ll quickly find ways to improve it. Meanwhile, your problem story will stir around under the radar and reemerge with fresh energy.

Writing Compelling Description

frontcover 600The Heart and Craft family of fine publications has expanded. Today marks the official debut of The Heart and Craft of Writing Compelling Description.

Chapters in this book may sound familiar to some. Each of the forty-eight chapters appeared as a post on this blog. Many may wonder why I published this book when all the content is available online. Here’s the story.

I already had a short anthology of description-related posts that I’ve used in various ways over the past few years. One gray January day, I whimsically decided to transform that document into a $.99 Kindle short. I thought it might take … maybe three hours. That was three months ago!

Many of my favorite posts were missing, so I sorted through nearly six hundred posts. Forty-eight made the cut. Next I shuffled them into some semblance of order, checked for dead links, and double-checked permissions for graphics. Sharing on a blog  the public can read for free is one thing. Using images in a for-profit publication is another. Some had to be changed. The posts needed more editing than I realized. A volunteer team of friends and writing group buddies offered  remarkable suggestions and the quality improved.

As I struggled with the introduction, I had an epiphany about the entire process of writing description:

Description is anything that shapes the reader’s perception of your message or story.

That insight blew out the walls of  my boxed-in concept of description as adjectives, similes and metaphors, opening a universe of creative options I had not previously noticed in those posts as I wrote them.

As the collection grew, friends convinced me this project had outgrown the original $.99 intention. They wanted to have a collection of those posts at their fingertips where they could easily refer to them, so I crafted a print version and turned to Amazon’s free CreateSpace publishing service as my printer and distributor.

During the ensuing weeks, various cheerleaders, with Gutsy Sonia Marsh at the fore, held my feet to the fire to develop a cover everyone was happy with. Writing group friends helped with content edits. Thanks especially to Elizabeth Kim, Carol Broz and Tom Imerito. How I valued their help with the book description! Who thinks about these aspects of publishing?

Hillary Clinton coined the phrase “It takes a village.” That phrase is equally true of publishing. Anyone can write a book, but it takes a village to ensure it’s a solid, well-written, well-crafted book the world can benefit from. I especially appreciate enthusiastic “beta readers” who have (or soon will) post reviews. I can’t begin to describe the sense of elated humility I feel as I read those reviews and personal comments.

The biggest differences between publishing this book and The Heart and Craft of Lifestory Writing (released seven years ago) is that this time I made final decisions on everything, and I control the business end. Even that book was a non-traditional experience. Although the earlier cover was professionally designed, it built on my concept, and I did all layout – an unheard-of arrangement when working with a traditional publisher. I love doing layout!

Controlling graphics for eBook conversion had a steep learning curve. I’ve now tamed that beast, and I can save you a lot of time if you ever need to know the secret.

Thanks again to all who have helped along the way, and I hope everyone else finds as much value in this new volume as you have!

Write now: I invite you to click over to Amazon and use the “Look Inside” feature to read the introduction to The Heart and Craft of Writing Compelling Description, and skim the reviews. Then either buy a copy of this new book and write a review. Or find a book you’ve recently enjoyed and review it. Reviewing is the best way to find hidden insights you missed on the first reading and milk even more goodness from the volume. It builds community with other readers, past and potential, as well as the authors.

Professional Looking Books the Easy Way

BookPageWhen I wrote The Heart and Craft of Lifestory Writing to help readers begin writing their lifestories, I knew that some readers would eventually be ready to publish story albums – collections of short stories – or full-length memoirs. To help them produce professional looking volumes, I included instructions for assembling and preparing the documents to take advantage of free Print-On-Demand services like CreateSpace.com. I gave detailed instructions for using Styles to simplify formatting and ensure uniform results. I explained how and why to adjust line spacing for easier reading and suggested a number of reader-friendly fonts readily available for free download. I gave instructions for setting custom page size and effective margin settings. You’ll find everything there that you need to know to create a “real” book that doesn’t scream BEGINNER BOOK!

But, I admit it, there is a learning curve, and it’s more effort than many people want to invest. Until now, if you didn’t feel up to the challenge, have the time to try, or have a friend or relative you could cajole into helping, you could either settle for the home-made look or write a big check to a book designer or layout service.

I have great news: Joel Friedlander, veteran book designer, publisher of The Book Designer.com  and author of over 700 helpful articles for self-publishers, just launched a new service offering affordable, professionally designed templates that allow you to produce a polished book project with Microsoft Word. These templates relieve you of all decisions about line spacing, margin settings, header arrangement, font choices and more.

All you need to do is to write, edit and polish your manuscript, paste it into the template, and follow the comprehensive set of instructions to add header information, apply body text and title styles, fill in publication information and so forth. Add a cover and upload to CreateSpace and you’ll amaze everyone with your stunning results.

You may be wondering if I’ve used one of these templates. No, I have not, and I’m not getting a commission or any other incentive from this recommendation, but I know a good thing when I see it. I have used the same process they did to create templates (I even tell you how to create your own templates in my book), so I know how they work. It may be a little tedious, even stressful at first, but it isn’t rocket science, and it’s way easier than starting from scratch. You’ll also find templates for producing eBooks that coordinate with the look of your print project. That alone is worth the cost of the template.

If you are even thinking of someday publishing a volume for your family or the world at large, pay a visit to Joel’s sites. Look through the wealth of general information at The Book Designer.com and download a copy of his free eBook, Ten Things You Need to Know About Self-Publishing. Then click on over to Book Design Templates.com and check out the selections. While you are there, look for the Guides link on the menu bar where you can download copies of his free Book Construction Blueprint and  Template Formatting Guide eBooks. They are “must read” material, even if you don’t plan to use his templates.

As powerful as they are, current Book Design Templates don’t currently include one key element you’ll probably want: automated magic for inserting photos. Fortunately you can find step-by-step instructions for doing this beginning on page 264 in The Heart and Craft of Lifestory Writing.

You put an enormous amount of time and thought into writing your stories. You owe it to yourself and your stories to make them look as good as they sound.

Write now: take a break from writing and read Joel’s free e-Books, then watch a few YouTube video tutorials on using Styles to ease your way whether you use his templates, the instructions in my book, or wing it on your own.

Give the Gift of Story

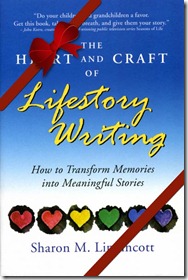
book-giftIf you, like Santa, are making a list and checking it twice, here’s a gift idea for adult relatives: stick a copy of The Heart and Craft of Lifestory Writing in their stocking.

This gift is a way of urging them to record their stories for you and the future. While you’re at it, order a copy for yourself. While you may not be able to crank out the story of your entire life in the next six weeks, you can begin now with a single story or two. If you write two pages a week, you’ll have six hundred pages in two years.

Amazon has dozens of books explaining how to write lifestories, and all have merit. In fact, I encourage anyone who is serious about writing lifestory, autobiography or memoir to read several.  I also encourage them to begin with mine, which is the most comprehensive I’ve found.

In addition to the usual guidelines for writing stories, here’s a list of features that set The Heart and Craft of Lifestory Writing apart:

  • Start-to-finish instructions on planning writing projects, whether you want to write a simple story about a single incident or a complete history of your life.
  • Guidelines for finding your personal writing style, whether you are a spontaneous binge writer, or someone who likes an orderly, little-bit-at-a-time process.
  • Simple explanations of elements that bring stories to life like description, strong beginnings and endings, including personal reflection, and more.
  • Concise overview of grammar and punctuation. Everything the average writer needs is covered in a one place.
  • Layout guidelines with step-by-step instructions for using your computer to prepare attractive printed pages.
  • Self-publishing overview explains the basics of preparing finished volumes of stories or memoir for uploading to free Print-on-Demand (POD) publishing sites like Amazon’s CreateSpace.
  • Extensive list of writing prompts to trigger memories about any stage of life.

Please understand: this book is not intended to be read cover-to-cover, non-stop. It’s a user manual for the writing process. Read some, then write. Then read more. Repeat until your project is finished. Then read again and start another volume. It’s addictive!

Write now: click here and enter ordering information for several copies of  The Heart and Craft of Lifestory Writing! Then write notes for each recipient explaining that you’ll never be able to remember or tell their stories the way they do, and you hope they’ll write them down as a legacy of family history. Explain that it’s okay if they write these stories as a series of letters. The book will show them how to get started.

Why I Self-Published

CherryBlossomsInTwilight-coverThis week I’m pleased to feature an invited guest post from Linda Austin, author of Cherry Blossoms in Twilight, and a colleague from the Life Writers Forum and Story Circle Network.

My mother has a lot of interesting stories of growing up in Japan during and around WWII. I wanted to write her memoir. Although it started out as a family project, this memoir became something I thought would interest a lot of people, particularly educators as Japanese civilian stories from WWII are rare. This project took so long that I began noticing signs of Alzheimer’s in my mother, and then the newspapers began writing about the 65th anniversary of the end of WWII and I knew I had to get busy.

After three months of drop-everything-to-write, I was able to hand a softcover print memoir to my mother in early September 2005, in time for her 80th birthday, barely in time to publicize it in conjunction with the anniversary of the end of WWII. Cherry Blossoms in Twilight was self-published through a local printer featured in the newspaper along with an article about the St. Louis Publishers Association. This article led me to self-publish – I had no time to bother with finding a publisher because I wanted this book for my mother before she lost her ability to read or understand what I had done.

My mother, our family, friends and strangers raved about the book, but I wasn’t satisfied with it, especially after I joined the St. Louis Publishers Association (SLPA) and learned so much about publishing. I produced a second edition using everything the SLPA taught me. I tweaked the story to better suit what readers might want, had a new cover by a professional cover designer, and uploaded the book to Lightning Source for print-on-demand and an excellent distribution system. Schools, libraries and bookstores could easily buy it, and I’m proud to say Princeton University carries a copy. Amazon’s CreateSpace was not in existence then, only Amazon Advantage (Take-Advantage, I called it).

I’ve been a board member of SLPA for over six years now, with my nose in everything to do with publishing. Yes, I’d self publish again. I’m working on a book of poems inspired by my mother’s dementia and my visits to the nursing home, and I’ll use CreateSpace because I won’t need distribution (poetry books don’t sell well). I’m also formatting Cherry Blossoms to upload to Kindle Direct Publishing. I’ve used Lulu.com to publish hardcover and softcover short memoirs for elder folks – just for the families, though. Lulu was very easy to use and perfect for producing a couple dozen copies, but using it to publish for the public is expensive, as it is with most publishing services companies.

With the advent of e-books and affordable, good quality print-on-demand technology, there’s never been a better time to take charge and self publish. But, you’d better know what you’re getting in to and what you’re doing or you could spend a lot of money unnecessarily or end up with a book that won’t sell (or both). Self-publishing is the shorter route, not the easy route, and many authors balk at marketing.

I advise new authors to read everything they can about publishing – and marketing. (Marketing actually starts with writing.) Every author these days must market his or her own work. Traditional publishers are struggling with Amazon, the bad economy, the advent of easy self-publishing, and the popularity of e-books. They can’t afford to market much and are more careful than ever about taking on the risk of unknown authors. You can wait ten years or more for a traditional press to accept your work, which may never happen, try for a small press (easier to be accepted, but buyer beware), or take the reins, study the road map, and make your own way into the realm of publishing.

Linda uses her website, Moonbridge Publications, to encourage others to capture life stories. She has collected and created some resources to help get started on the journey of memoir writing and publishing. Self-publishing is an intricate topic way too big for one post, but articles listed under the resources tab of the Moonbridge Publications website will help new authors navigate the field of publishing choices and make smart decisions that result in a professional-looking book without breaking the bank.

End of the Line for Lulu

EndOfLineFor several years I’ve been an enthusiastic supporter of Lulu.com for those wishing to self-publish a small number of volumes of their lifestory or memoir. I’ve posted several times about my experience publishing my preschool memoir, The Albuquerque Years on Lulu. 

Over the past five years, many friends and students have followed my advice and lead, using Lulu to publish their projects. I’m now recommending Amazon-owned CreateSpace, the no-fee Print-On-Demand provider of choice. Let me explain why I’ve removed The Albuquerque Years from Lulu’s website.

Without asking for my permission or notifying me, Lulu converted my document to ePub format and uploaded it to the Apple iStore and the Barnes & Noble digital catalog, setting the price at $2.99.

That was not okay with me! If that isn’t illegal, it’s certainly unethical. I immediately removed it from those catalogs.

I was never given the opportunity to review the conversion for formatting errors. The Albuquerque Years includes over two dozen embedded photos, which are notoriously difficult to position in ePubs. When I finally discovered how to download the ePub file, I noticed that the pictures do display between paragraphs, but not always between the ones they are relevant to. It needs some work before I re-release it, probably via Smashwords.com, as a free download.

I never added a “royalty” markup to the book, intending for any interested readers to purchase it at my wholesale cost, which has risen from about $2.79 five years ago to $3.99 today.

To my surprise, tens of unrelated people opted to purchase a paper copy. Today, if the book were still listed on Lulu, the “retail” price would be $7.99. I’m relieved that nobody (including me!) has ordered a copy since this outrageous inflation began. I certainly don’t want anyone thinking I caught the greed bug.

A LiveChat customer service agent (Lulu does not offer the option of phoning them directly, toll-free or otherwise) fed me some corporate line about “the stated current manufacturing price”, but was unable to explain why my wholesale price was lower. I can’t blame him. He’s just doing his job. I refuse to support the executive attitudes behind his explanation.

The free eBook (pdf) dowload link disappeared.

I intended for the pdf version to be free, as it was for over four years. Just before I “retired” the project (I discovered you cannot delete published projects), I discovered that the link to download the free pdf ebook was missing. I have fixed that. The link to The Albuquerque Years in the right sidebar now connects with my personal server for free digital downloads. (Click here now to get your own copy if you don’t already have it.)

Lulu’s pricing has become unpredictable.

Over the past year or two they have begun sending out a steady stream of “special offers” like 10% off, free shipping, 20% off, third book free, etc. Although I’m a die-hard bargain shopper, when I’m ready to buy a book, I don’t want to feel like if I waited another week, the price would drop, and I especially resent having retail prices inflated to cover this system.

By contrast, CreateSpace offers consistent pricing far lower than Lulu’s, free phone support, and they scan your uploaded document for typos and punctuation/grammar errors. Wow! The volumes I’ve seen coming off their presses are first rate in quality. Forums are full of great recommendations. Jonna Ivin is delighted with her experience using them to publish Will Love For Crumbs (see her guest post on this topic). I plan to upload a project myself to give them a whirl in the near future.

Write now: if you haven’t already done so, visualize a completed volume of your life story. It may take the form of a collection of individual stories or a memoir integrating those stories into a unified account. You may be writing more about family history. Perhaps your book will include lots of photographs. Let your vision grow and pull you forward. Set up an account at CreateSpace to add magnetism to that goal. 

Gift from the Heart

StorybookGiftAre you among the growing number of people searching for ideas for more personal, low-budget gift ideas for people on your Christmas or Hannukah  list this year? Many are motivated by the sagging economy, others by a desire to cut down on frivolous consumption and a general shift toward sustainability.

One gift you can give, in place of or in addition to others, is the gift of story. If you already have a pile of life stories and you’ve been thinking about pulling them together into a volume, you have plenty of time to pull it together and place your order by Thanksgiving or shortly after to ensure delivery before Christmas.

If you don’t yet have a pile of stories, you still have time to write several. You could write a personal story for each recipient, recalling a favorite memory of that person and why they are special to you. You might write humorous or poignant stories about your own life or perhaps shared ancestors.You can include essays about your beliefs and values. The list is endless.

Many years ago Thelly Rheam, the original Story Lady from California’s Cardiff on the Sea, began writing short vignette stories documenting her life and lessons she learned, planning to distribute stories she’d written through the year to family members each Christmas. The year she began, she gave each child and grandchild a binder with labeled dividers for each decade in her life and an assortment of stories already filed. In subsequent years, they received envelopes with additional stories and instructions on where to file them in the binder. She has set aside funds and made arrangements for the collection to be printed in bound volumes upon her demise.

Writing a memoir, a rewarding though complex undertaking, is one way to organize your stories, and but it’s far from the only way, and no single memoir can encompass all the stories that come to mind.

In The Heart and Craft of Lifestory Writing you’ll find oodles of ideas for organizing collections I refer to as story albums. These can range from a random assemblage of miscellaneous memories to an compilation of family recipes including the story of each, or a composite of photos and the stories surrounding them. This khelpful book covers all the basics from inception of the idea to writing tips and prompts and layout tips for self-publishing.

Publishing options abound. High-end photobook publishers produce gorgeous full-color volumes, but options for accomanying text are limited, and price soars as page count rises. No-setup fee Print-On-Demand services like CreateSpace or Lulu,  are economical alternatives for commercially printed and bound volumes if black-and-white print is adequate. They can also handle color printing, though at a much higher cost. For special projects, you can print pages at home or a copy shop and put them in binders or similar alternatives.

Thinking outside the box, they don’t have to be printed at all. You could make your own eBook in pdf format, using one of  the free pdf “printers” such as PDF24. Smashwords is a free service that coverts print documents to Kindle and other eBook reader formats.  Or you could use the free Audacity software to digitally recording  yourself reading your stories for an audiobook. Going one step further, you could use the free Windows Live Movie Maker to  combine those recordings with photos and turn them into a movie. Similar applications are available for Macs.

Due to limited space in this post, I can’t expand on individual options. If you have questions about specific ones, please leave a comment and I’ll cover them in a future posts.

However you go about it, give your family the gift of story, for  their reading pleasure and to preserve a legacy of your life.

Write Now:  write a story to share with  at least one person as a gift this holiday season.

Self-Publishing: Running the Numbers

CostsAccording to Jerry Waxler, author of the Memory Writers Network blog, “I have been attending writing conferences for years, where the advice from established writers has always been to look at self-publishing as a last resort. That advice is now officially ended.”

Interest in self-publishing has never been higher, and it’s entirely doable today. In fact, it’s entirely possible to use a Print-On-Demand (POD) do-it-yourself service like Amazon’s Createspace subsidiary to produce a single volume without investing a single penny in anything other than the cost of printing and shipping.

This no-investment option is perfect for people who are only interested in producing a handful of books for family and friends. It becomes more complicated and challenging when you have a story you want to have noticed (and bought!) by the general public. To gain the attention and respect of the general public takes more time, effort, and – let’s face it – investment of time and/or cash. Below is an overview of publishing elements you absolutely must attend to if you want to have a professional-quality manuscript that will receive the notice you strive for:

Editing
It’s absolutely necessary to have more than one mind and two eyes involved. At the very least you'll need four to six astute "beta readers." At the very most you'll need a professional editor. I use beta readers to check the professional editor's work!

Layout and Design
I've seen some ugly, sloppy books from indie (independent) presses. I mark them down in reviews, and won’t buy from that company or author again. Layout isn't rocket science, but especially if you do it with Word, it takes a huge amount of patience and ability to attend to detail. If you use graphics, you add another dimension of complexity. Precise placement on book-size pages, with controlled wrapping – it’s enough to drive even an experienced user screaming into the night.

You may not even know about details like page and chapter headers, publication data page, Table of Contents (do you need this?) line spacing ... all things that differentiate a professionally produced volume. If you want a commercially viable book, you may need help attending to these details.

Cover
Covers are critical! People see the cover. Even if they don’t judge you book by it, they will form a first impression, whether on Amazon, the shelves of bookstores, or in the library. If you create your own cover, bone up on what needs to be where, and use focus groups of friends to refine it.

Promotion
If you want your book to be noticed, you'll have to send out lots of review copies. To whom? You’ll want too a blog tour. Which blogs? Promotion is a never-ending challenge with more facets than a diamond. You may want to use a publicist.

Cost
All of these services add up. For a 200 page book (around 50,000 words), depending on the level of need, editing will run an average of $3000, maybe more. Layout and design may be another $500 or more. Add another $200 for the cover. With shipping from the printer to you and then to to the reader, 40 review copies will run around $9 each, for a total of $360. So ... you have an investment of around $3000.

You’ll also want to spend about $120 to buy your own ISBN. You can get one for free, but using your own lets become an independent publisher with a name of your choosing. If you use the free one, the Print-On-Demand service will be listed as the publisher. 

A website is another requirement. That will cost another $80 or so per year for a hosted web domain. You'll probably want to pay someone at least $300 to design your site.

Bottom Line

Editing
Layout
ISBN
Review copies
Website
Web hosting (annual)

$3000
500
120
360
300
     80
$4360

Now assume you set the price of that book at $17. The cost to print on a per-copy basis will be around $8, plus shipping to you, so we'll modestly assume your actual net on a per copy basis will be about $7. To recoup your investment, you'll need to sell 623 copies! That's fairly modest, and if you've invested all that income and get decent reviews, it’s an achievable goal. Income from additional sales can go to buy a new computer and fund your celebration party. Book sales probably won’t fund your retirement!

You can control costs by doing a larger print run, but then you also have to store 1000 books (they come 48 to a box, and the boxes are about the size of a small microwave. Figure out where you'll put 22 of those boxes) and cartons of shipping envelopes. You’ll need to mail books out as they are ordered, plus ship supplies to Amazon and ... you'll probably want to invest in fulfillment services which will eat up most of your savings, maybe more. 

That's the reality of self-publishing. If you master layout skills, or barter your layout services for Susie's editorial eye, you trade time, and conserve cash. Which is more important? Which do you have the most of?

These are all factors to consider as you determine whether you really want to publish your own book, and the value of packages of support services if you do.

Write now: spend some time journaling about your hopes and dreams for your book. Run some numbers and think things over. Balance the option of a simpler book for a narrower audience versus making that big splash. Follow your dreams, but don’t walk into total fog.  

Financial Costs of Publishing a Memoir

Few topics are hotter among aspiring memoir writers than the debate about the value of going public with your story. Most of the debate centers around the issue of upsetting family and friends. That is a valid concern. Far fewer consider the financial cost, and far too many authors end up feeling discouraged and disillusioned as they bathe in red ink. Let’s take a look at the facts.

Publishing costs vary from one individual to another, and depend on a combination of your skills and your publishing strategy. For example, for The Albuquerque Years, I had the skills to do my own editing and layout and create a professional looking cover myself. Then I uploaded the files to Lulu.com and have finished books available without investing a single cent.

In contrast, I know people who have spent $2000 or more on professional editing and layout services, cover design, and press preparation. Some spent another large chunk of cash on a press run of several hundred or a thousand books and promotional aids. One friend invested over $5000 by the time all the prep, printing and publicity was done.

Is it worth it? For me it definitely was. I never planned to make money on The Albuquerque Years and didn’t add any royalty mark-up to the price. I purr like a kitten with a saucer of cream when someone orders a copy, and a gratifying number have done so.

According to a post on “Sales Statistics” in the blog How Publishing Really Works, average sales stats for most individual books, especially self-published one, are plummeting — hardly surprising, considering the glut of new titles. According to this post, in 2004, Publisher’s Weekly reported that only 83 of more than 18,000 iUniverse titles published that year sold more than 500 copies. It goes on to quote iUniverse VP Susan Driscoll’s admission in the New York Times that in 2008 most iUniverse authors sold fewer than 200 books. Author
s House titles did even worse, with an average of around 54 sales per title.

Let’s do the math. The least expensive package available on iUniverse right now requires the aspiring author to invest $599. Editing, promotion, and other services are available at additional cost. If you sell 200 books, that basic investment works out to $3 per book. It’s not easy to discover the royalty structure on iUniverse, but if you exceed $5-$6 per book, you’ll probably price it out of the market. If you add the cost of professional editing, you are unlikely to break even at the 200 book level.

If you need to pay for editing, layout and cover design help, even with a no-cost Print On Demand (POD) option like Lulu.com or Createspace.com, you’ll have to sell a huge pile of books to break even.

So, where does that leave you? If you feel compelled to write and publish a book about your life, go for it. Go for it with gusto. As you write, keep these factors in mind:

Forget any idea of making a profit. Focus instead on the pleasure of completing a project that will prove satisfying for the rest of your life. If you lose money, consider it an investment in personal education and gratification.

Write primarily for personal satisfaction. Think like a Visa ad: “Editing, $1200. Proof-reading, $300. Layout, $500. Holding your dream in your hands, Priceless!"

Be realistic in your planning. Don’t spend hundreds or thousands of dollars on editing services in the blind hope they will help you sell a book unless you can afford this as a personal indulgence or training. It may pay off occasionally, and it may help you land an agent and commercial publisher, but if you do land an agent and publisher, your per-volume royalty will average around $1 per book, and you are unlikely to get an advance.

Keep hope alive. Even knowing that the chances of having your book hit it big and sell hundreds of thousands of copies is akin to that of winning the lottery, some do. Yours could. Dream big, plan smart, and learn everything you can about marketing books.

There is a back door around these costs. Form a collaborative with other writers, local or on the web. Trade proof-reading services with trusted and discerning friends. Brush up your layout and formatting skills. (The Heart and Craft of Lifestory Writing has a chapter to help with this.) Join a writer’s group or take a class to improve your skills and get feedback on your plot, character development and other story elements. Use the online templates on Lulu or CreateSpace to design an attractive cover.

With these economizing measures, your writing skills will improve and you can have a book you’ll be proud of, your family will cherish, and you can promote as much or as little as you like. However you publish, please let me know you did it, so I can celebrate with you.

Write now: do some research and come up with a balance sheet on what your anticipated publishing cost would be with various alternatives. Then devise a plan for getting your story into print.

Write-It-Yourself Gifts

The holiday season is approaching approaching like a freight train, and legions of people are looking for inexpensive gift ideas this year. Here’s an idea for you: Give the gift of yourself.

If you have already been writing life stories, this may be the perfect year to compile an anthology of your stories, lay them out nicely in a single document, and upload them to Lulu.com or Amazon’s CreateSpace for printing. You can produce a fully professional volume in your choice of hard or soft cover for a fraction of what it used to cost. For example, a 220 page paperback in the standard “trade” size of 6" x 9" lists right now for $6.25 base price on Lulu.com.

I used Lulu.com last year to publish The Albuquerque Years, a memoir of my life as a preschooler. It is 88 pages, full of photos, a slightly larger, wider page size (7.44" x 9.68") to accommodate the pictures and it sells (without any markup) for $6.29 on the Lulu website. You can also download a free eBook version there.

If you are primarily interested in creating books for your own use as gifts, or for order at cost by family members and friends, I recommend that you work with Lulu. They will convert your file to pdf format for you (although you can easily do this yourself with the free, downloadable pdf conversion utility, PrimoPDF), they have on online cover creation utility if you need help with that, and they allow you to list the book in their catalog without adding a markup for royalties if you wish. You can even allow people to download your book as a eBook for free from their website.

CreateSpace also allows you to obtain copies of your book with no set-up fee, and they may be even less expensive than Lulu. I say may be, because quite frankly, I find CreateSpace confusing and a bit intimidating. I set up an account, but did not easily find information on pricing and related matters. Even though it is confusing, I do recommend CreateSpace for projects you want to sell commercially with a royalty. The direct link into Amazon is probably worth the hassle, and I have heard good things about the quality.

There are other Print-On-Demand services, but these are the only two I know enough about to comment on.

If you don’t have a pile of stories ready to be compiled, you may prefer to do a cookbook with favorite family recipes. Write a short story with a quick memory associated with each recipe, and include Cooks Notes about menus using the recipe, special modifications you make, who especially likes it, and that sort of thing. I haven’t checked this on CreateSpace, but on Lulu you can order your book bound with a comb binding, a nice option for cookbooks. The advantage of using Lulu is that you can select page sizes other than letter-size as you’d get at a local copy shop.

Since you can include an unlimited quantity of photos and other artwork in a Print-On-Demand book, you could also create an annotated photo album. Lulu can print in color as well as black-and-white, though the cost per page is significantly higher.

If you need help with layout to get your manuscript ready for conversion to a pdf file, I give step-by-step instructions for everything you need to know in the final chapter of The Heart and Craft of Lifestory Writing.

So, there you have it — ideas for write-it-yourself gifts, and a referral to a production partners to make it happen. Get those fingers flying while there's still time, and delight the people on your list with a one-of-a-kind, write-it-yourself gift.

Write now: an outline of contents for a gift book for one or more people. But don’t stop with the outline. Keep your momentum going and create the file.